The instructions below are for informational purposes only. I assume no liability and no responsibility for damage of any kind arising from the use of the information provided. It is used without my involvement and at the user's own risk.
The cutter
The task of a cutter is to detach the film cone from the wrapping aid. To do this, an exactly straight cut must be made at the height specified for the respective caliber. So that the cut can be carried out in the desired way, a blade must be fixed in a holder.
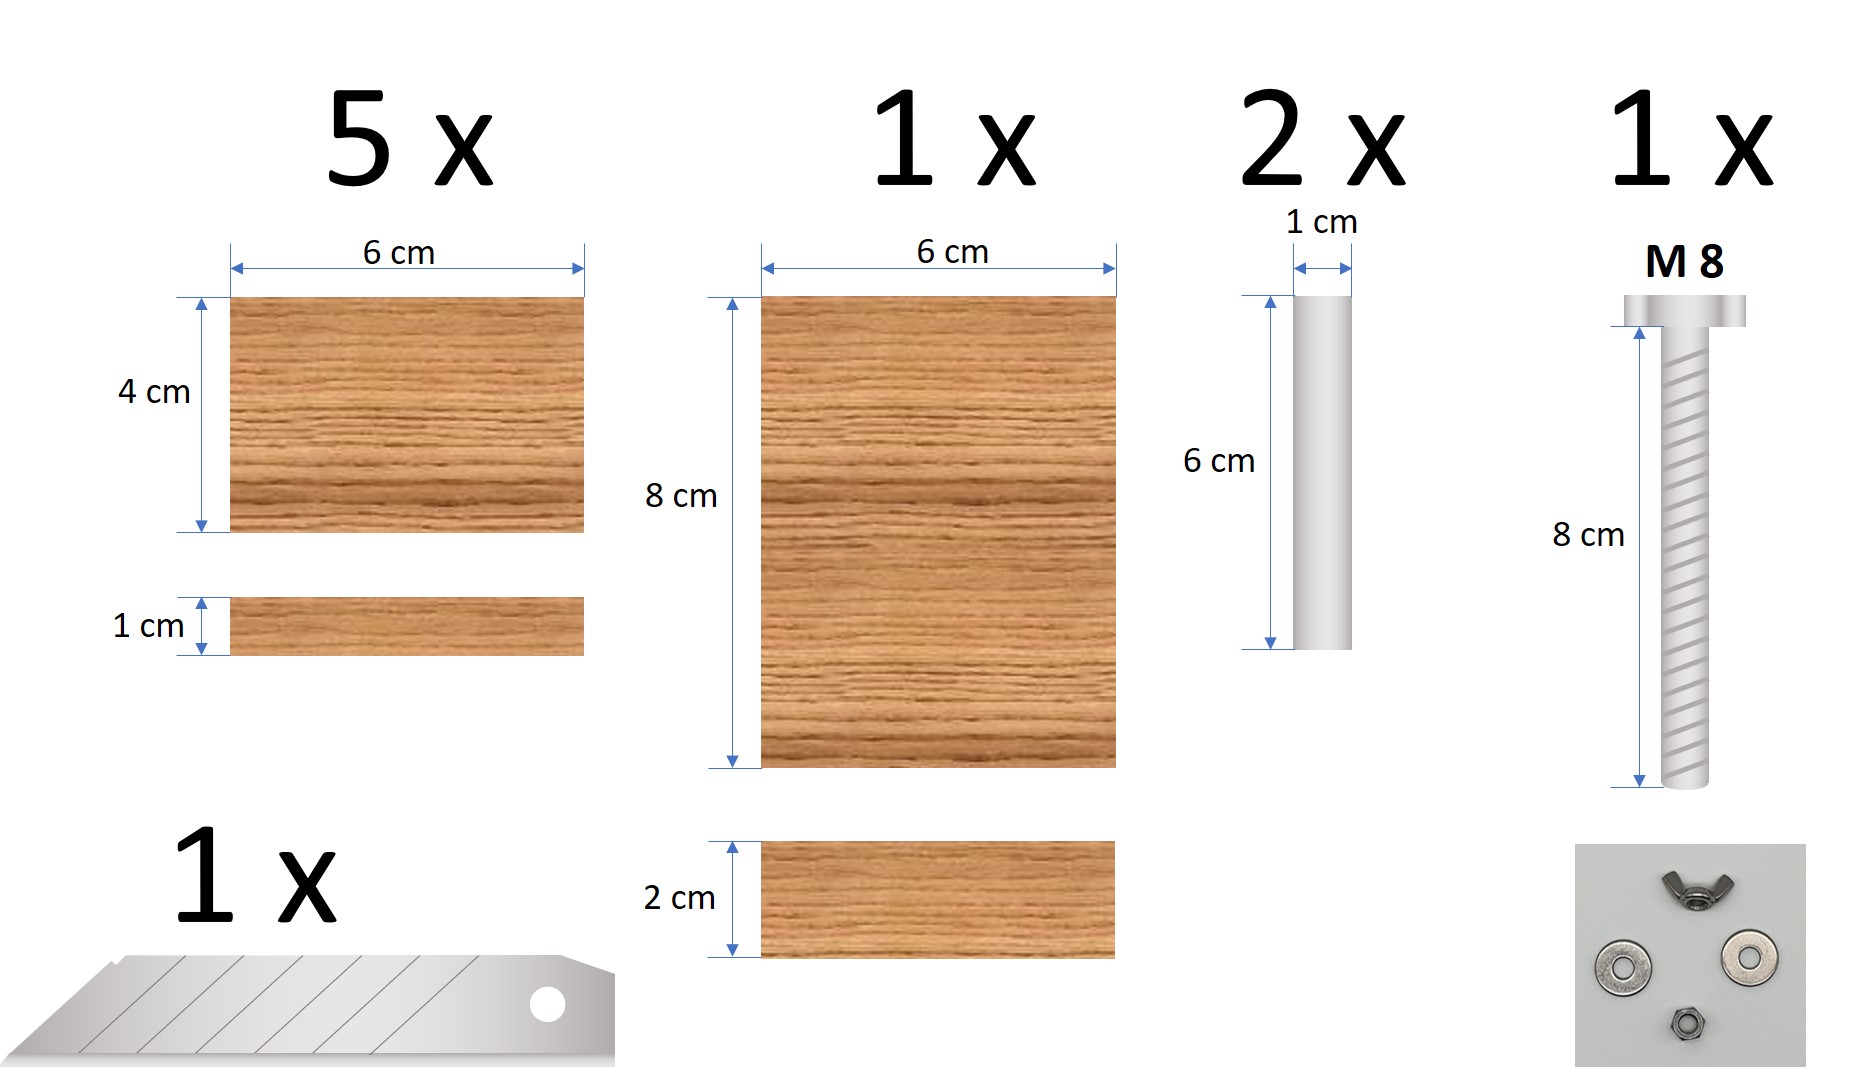
I use the blade of a utility knife for this. These blades are sufficiently sharp and can be easily changed.
Attention: The blade of this tool is not protected. Improper handling of the cutter can result in serious injury.
My goal was to build a cutter that, on the one hand, can be built from easy-to-obtain materials. On the other hand, it should be a space-saving design that enables repeatable work. I got beech slats by the meter at the hardware store for the construction of the cutter. Beech slats because this wood is quite hard and is therefore well suited for this cutter. The wrapping aid is often pushed back and forth on the cutter's worktop. Soft wood would become uneven here after a short time.
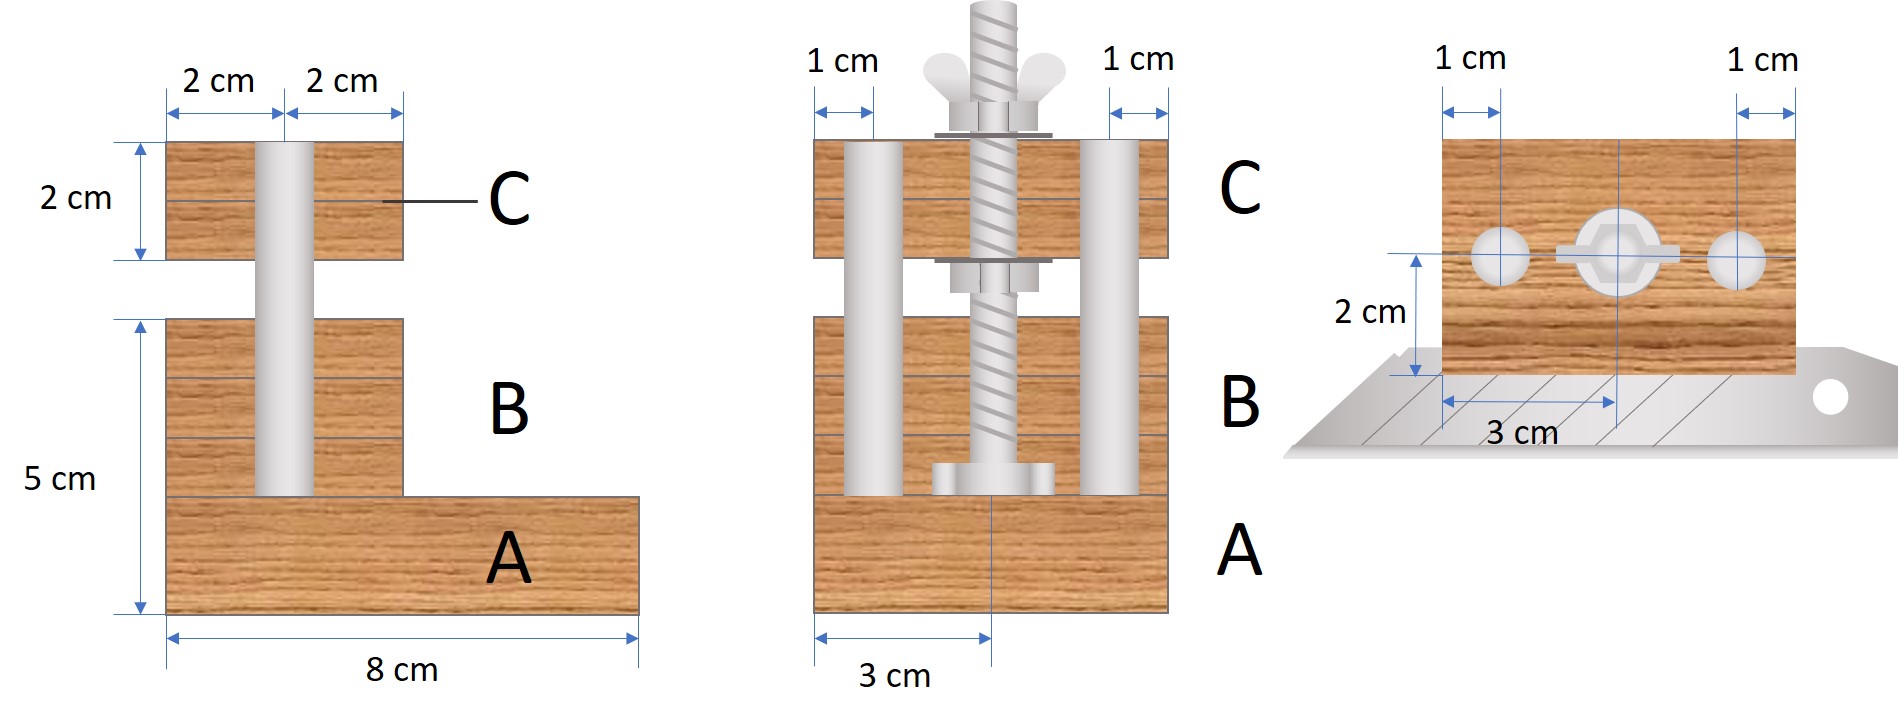
The cutter consists of three areas.
A. Work table
The work table serves as a base for the winding aid. The winding aid is placed there and pressed against the blade. Since there is always movement here and the winding aid is pushed over the work table, soft wood should not be chosen.
B. Leadership
The guide is there so that the blade holder can be adjusted and also fixed. The blade should be held firmly by the guide. In addition, the guide should ensure that the blade holder has as little play as possible. In order to achieve this, I have embedded two aluminum rods as guide aids next to the adjustment thread. The aluminum rods are simply stored in the holes. It is not necessary to route them through a socket. The fixation of the guide requires two nuts. Below an adjusting nut with a washer and above a washer with a fixing nut in the form of a wing screw. The correct height is set with the lower adjusting nut.
C. Blade mount
The blade holder consists of two loosely stacked pieces of wood. They are aligned by the two aluminum guide rods. The blade holder is fixed with the wing screw and the blade is clamped. To prevent the blade from being pressed into the blade holder when the winding aid is pressed against, a small edge should be worked into the lower wood of the blade holder with a file. This prevents the cutter blade from shifting.
As a guide to correctly aligning the blade height. I set the distance from the work table to the underside of the blade to exactly 56 mm for the .625 caliber. Maybe this will help one or the other to find the best position for the blade.